Close-Up Filters vs Extension Tubes: When to Use Which for Macro Photography
Macro photography doesn’t always require a dedicated macro lens. Two popular, budget-friendly alternatives are close-up filters (diopters) and extension tubes. Each changes how your lens focuses, and each has its own impact on image quality, magnification, working distance, and ease of use. This article combines a clear overview with a practical, image-led comparison so you can pick the right tool for your style.
How They Work — The Basics
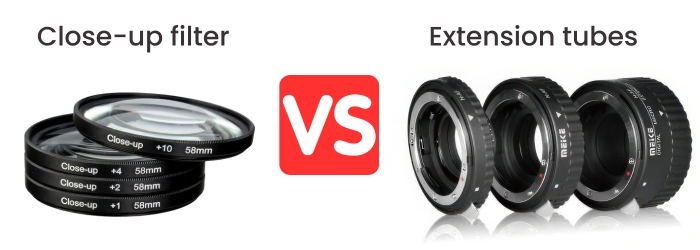
Close-Up Filters screw onto your lens’s front thread and act like a magnifying glass, shortening the minimum focus distance for more close-up capability. They don’t affect exposure but can introduce optical distortions unless you use achromatic versions.
Extension Tubes mount between your camera and lens, moving the lens farther from the sensor. This allows closer focusing and higher magnification with no glass added—hence, no optical degradation.
Magnification & Working Distance — What to expect (without the math)
Close-Up Filters favor longer focal lengths (telephoto zooms). You get a strong close-up effect while keeping more working distance (great for insects and flowers) and hand-held exposure stays easy because you’re not losing light. Stacking multiple diopters is possible but quality drops quickly—stick to one good achromatic filter for best results.
Extension Tubes shine on short/standard lenses (e.g., 35–70 mm). You can stack tubes to push magnification very high—even beyond life-size. Trade-offs: you’ll be physically very close to the subject, light loss increases with more extension, and depth of field gets razor-thin. This is excellent for tabletop subjects where you can control light and stabilize the camera.
Rule of thumb:
• Short lenses + tubes → bigger magnification (but very close working distance).
• Telephoto + diopter → strong magnification with comfortable distance and easier exposure.
What it looks like — Example images
Extension Tubes Comparison
This side-by-side macro photography comparison uses Cotoneaster berries to show how extension tubes change the image. The center frame is no extension; the corners show 12 mm, 20 mm, 36 mm, and all tubes stacked (12+20+36 mm). As tube length increases, the berries look larger, working distance gets shorter, background blur increases, and depth of field becomes very shallow.
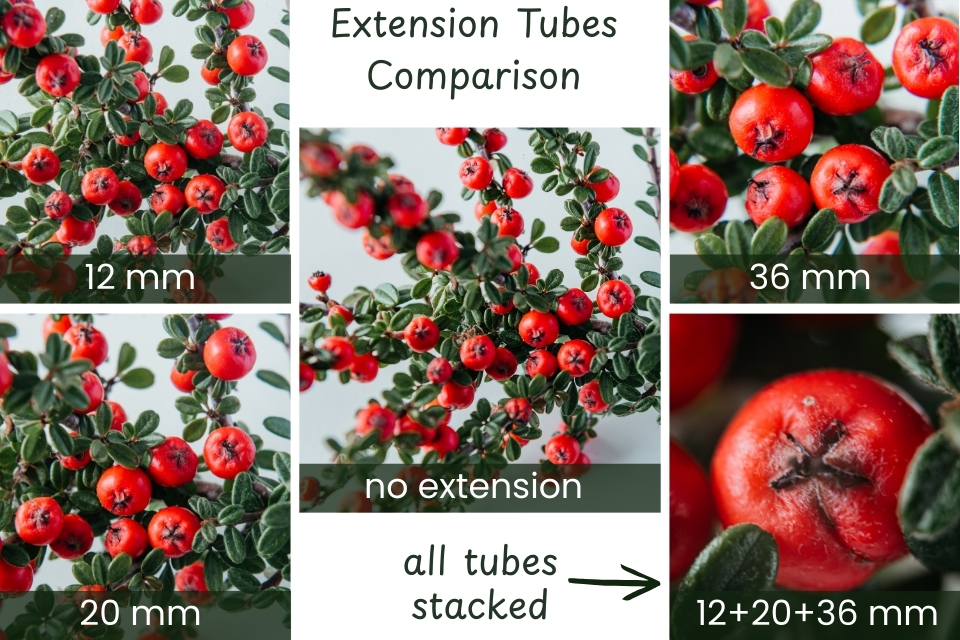 Taken with the MEIKE Macro Electronic Mount Auto Focus Metal Extension Tube (12/20/36 mm set)
Close-Up Filters Comparison (Diopters)
This side-by-side macro photography comparison uses a UK one-pound coin to show how close-up filters (diopters) change the image. The center frame is no filter; the corners show +2, +4, +8, and +10. As diopter strength increases, the coin appears larger (more magnification), the focusing window gets tighter, and exposure stays similar (close-up filters don’t meaningfully reduce light).
 Taken with JJC 77 mm Close-Up Filter Kit (+2, +4, +8, +10)
Image Quality & Compatibility — beginner-friendly guide
Extension Tubes
- Image quality: No extra glass, so you keep your lens’s native sharpness and contrast (no added aberrations).
- Handling: You must remove the lens to install tubes. That’s slower outdoors and carries a small dust-on-sensor risk.
- Exposure & distance: Expect some light loss and very close focusing distances (especially with short lenses).
- Compatibility tip: Choose electronic tubes (they keep aperture control and sometimes AF). One set works with any lens on your camera mount.
Close-Up Filters (Diopters)
- Image quality: Adds glass, so basic single-element filters can soften edges and cause color fringing.
Achromatic diopters (a two-element design) correct color and improve edge-to-edge sharpness—better quality, higher price. - Beginner note: You can still get good results with budget single-element filters—the example photos here were made with cheap single glass filters.
- Compatibility tip: Must match your lens’s filter thread; a simple step-up ring lets one larger filter fit smaller lenses. Because the diopter sits on the front, stacking other filters (like a polarizer) can be awkward.
- Image quality: Adds glass, so basic single-element filters can soften edges and cause color fringing.
User Insight (from Reddit)
“Extension tubes tend to work well with shorter focal length lenses… Close-up filters tend to work best with longer focal length lenses.”
Also: “Cheap tubes tend to produce better quality images than cheap filters. High-quality filters can be hard to find in large sizes.”
Final Thoughts
Both extension tubes and close-up filters are perfect ways to try macro on a budget. Start simple: pick up an inexpensive tube set or a basic close-up filter and practice. You’ll learn the essentials—focus, depth of field, lighting—without spending much.
Once you’ve got the knack and know what you enjoy, consider upgrading:
- Achromatic close-up filter for cleaner edges and less color fringing (size it for your largest lens and use step-up rings).
- Electronic extension tubes (12/20/36 mm) to keep aperture control and easier handling.
Quick tip: stack tubes if you need more magnification; avoid stacking multiple diopters as quality drops fast. Whatever you choose, both routes deliver real macro results for very little money.