Macro Accessories That Matter: Lighting, Rails & Budget-Friendly Gear to Boost Your Close-Up Game
You’ve got the lens — or maybe you’re using extension tubes or close-up filters. But something’s still missing…
That “missing piece” is often the support gear that makes macro photography easier, more consistent, and more creative.
In this article, we’ll cover:
- Why lighting is everything in macro
- The most useful budget accessories
- Which tools to buy first (and which to skip)
- Real-world setup ideas for DIY or field use
The #1 Macro Challenge: Light
As you get closer to your subject, two things happen:
- Your lens casts a shadow
- Less light hits the sensor (especially with extension tubes or small apertures)
That’s why adding light is essential — not optional — for macro photography.
💡 Macro Rule of Thumb:
Get close = get light
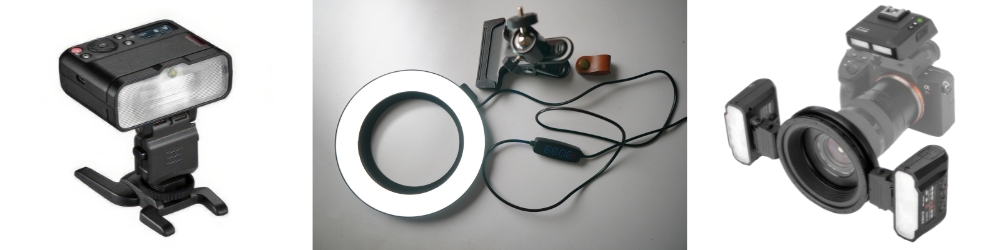
🔦 Lighting Options for Macro Photography
1. Ring Lights (LED or Flash)
- Wraps around your lens, casting soft, even light
- Great for flowers, coins, or flat subjects
- Easy to use and beginner-friendly
💰 Budget Pick: Neewer 48 LED Ring Light ($30–$40)
⚠️ Downside: Can look flat; gives circular catchlights
2. Off-Camera Speedlight + Diffuser
- Most flexible and powerful lighting setup
- Mounts to a bracket or held by hand
- Paired with a large diffuser, it mimics natural soft light
💰 Budget Combo:
- Yongnuo or Godox speedlight (~$60–$100)
- Softbox diffuser or DIY diffuser (foam, paper, etc.)
Why it’s great: Works for both macro and portraits or events
3. Twin Flash
- Two small flashes mounted on either side of your lens
- Adjustable angles give 3D modeling and more depth
- Ideal for insects, shiny objects, and medical work
💰 Example: Meike MK-MT24 Macro Twin Flash (~$250)
(Much cheaper than Canon/Nikon versions)
📐 Precision Tools: Focusing Rails and Tripods
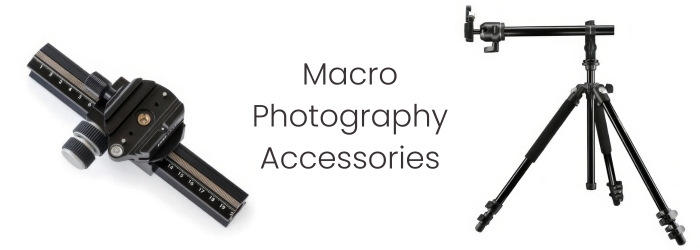
4. Macro Focusing Rail
- Mounts between your tripod and camera
- Lets you move your camera forward/backward by millimeters
- Crucial for focus stacking or extreme macro (like reversed lenses)
💰 Budget Pick: Neewer or Andoer 4-way rail (~$25–$45)
🧠 Use case: Shooting a dead insect or jewelry in a studio? This is your best friend.
5. Sturdy Tripod
- Any movement is magnified in macro, so stability is key
- Look for one with a reversible center column for overhead shots
- Ball head or geared head adds extra precision
💰 Affordable Option: K&F Concept or Manfrotto Element (~$80–$120)
Handheld Macro? These Help A Lot
6. Articulating Flash Bracket
- Lets you place your off-camera flash at just the right angle
- Frees up your second hand while keeping the light close
7. DIY Diffusers
- Tissue paper, milk cartons, translucent plastic — all can soften light
- The goal is to create a larger, softer light source, not a spotlight
🔧 DIY Idea:
Cut a piece of white foam to fit around your lens and mount a flash above — instant mini softbox!
Bonus: Reflectors and Backgrounds
- Foldable reflectors (silver, white, gold) help fill shadows in natural light
- Small background cards (e.g., black foam board or colored paper) let you control your shot’s background
💰 Price Range: $5–$30 — or free if you DIY
📦 Recommended Macro Starter Kit (Under $150)
| Item | Purpose | Approx. Cost |
|---|---|---|
| LED ring light or flash diffuser | Soft light source | $30–60 |
| Mini tripod or full tripod | Stability | $25–100 |
| Focusing rail | Precision focus control | $30–50 |
| DIY diffuser materials | Softer light | Free–$10 |
| Reversed lens or extension tubes | Magnification | Already owned? |
Final Thoughts: Accessories Are the Secret Sauce
Buying a macro lens or extension tube gets you into the world of close-up photography —
but it’s the support gear that helps you stay there and consistently get the shots you want.
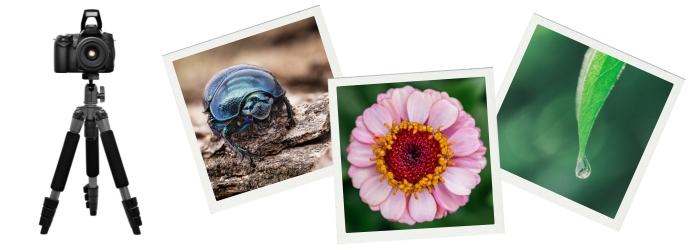
Whether you’re shooting a raindrop on a leaf or capturing the eye of a jumping spider,
having control over light, movement, and stability will take your results from interesting to jaw-dropping.
👉 Coming Next: Lens Magnification for Dummies